 |
 |
Bill Brodhead WPB Enterprises Inc
Radon & Vapor Intrusion |
 |
|
|
|
Bill Brodhead WPB Enterprises Inc.
Radon & Vapor Intrusion |
|
|
|
|
|
|
WPB Enterprise, Inc. -
|
|
WPB Home Page
Lots of Other Info |
|
WPB Enterprise, Inc. -
|
|
WPB Home Page |
|
|
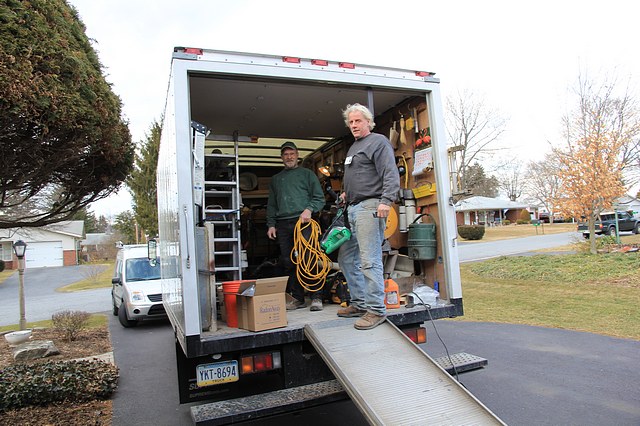
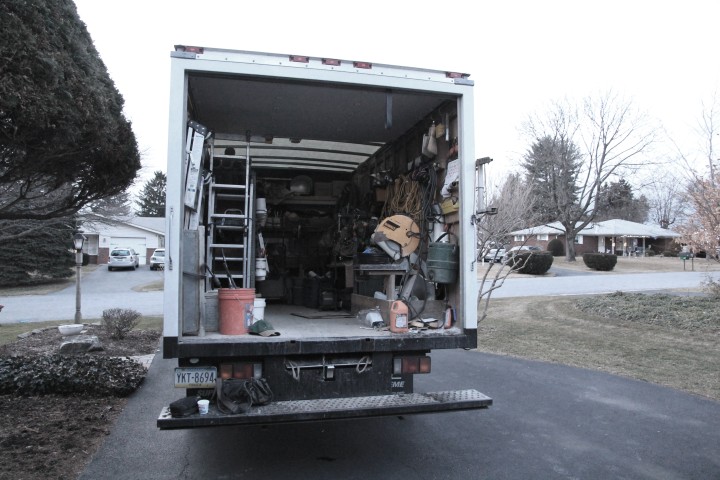
We use a large cube van for all of our installations. This way we can have a complete inventory of everything we will need to ensure your system is installed as it should be. All we ask is that you make room for us in your driveway because Mark and Brian are anxious to do a great job for you. |
|
|
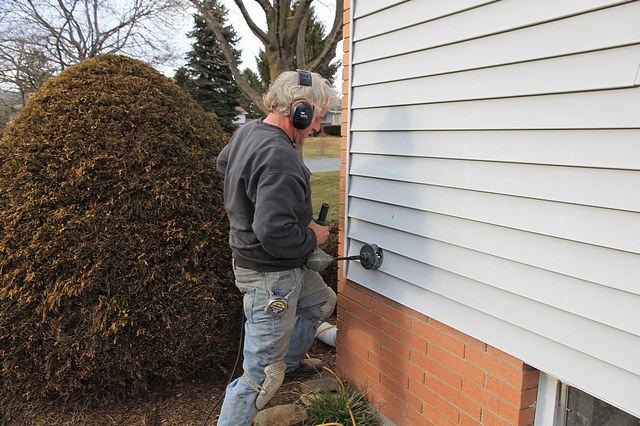
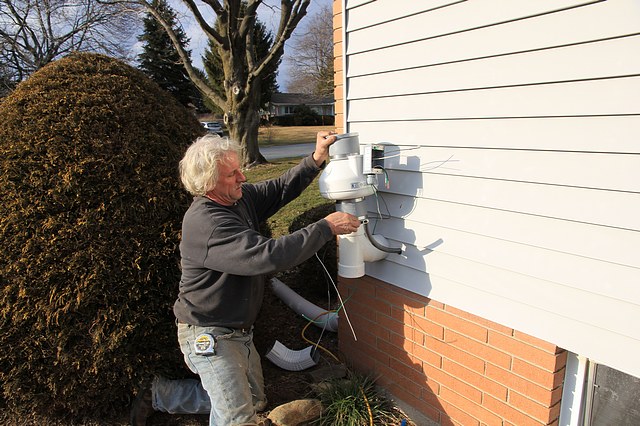
This will be a system with an outdoor fan. Mark is drilling a test hole through the siding to be sure it is lined up perfectly. |
 |
|
|
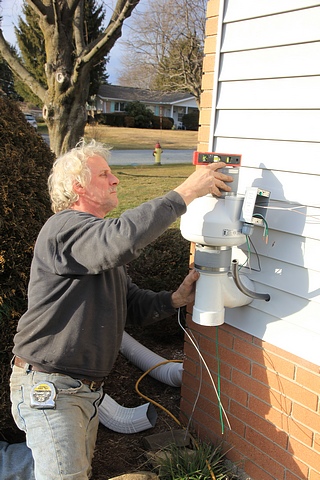
With the alignment just right, Mark uses a heavy duty right angle drill with a hole saw to cut through the siding and rim joist. |
 |
|
|
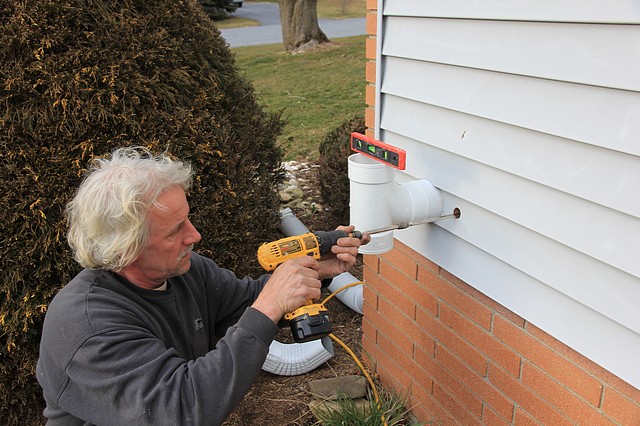
Mark is drilling a hole to install outdoor rated electrical conduit. Some radon companies use questionable extension cord type electrical connections |
 |
|
|
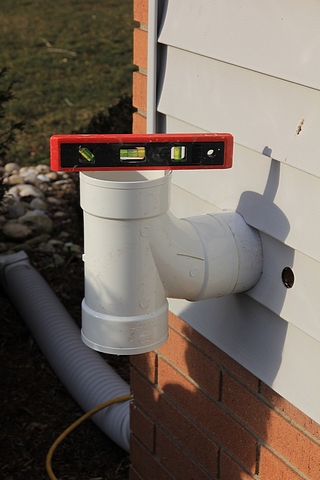
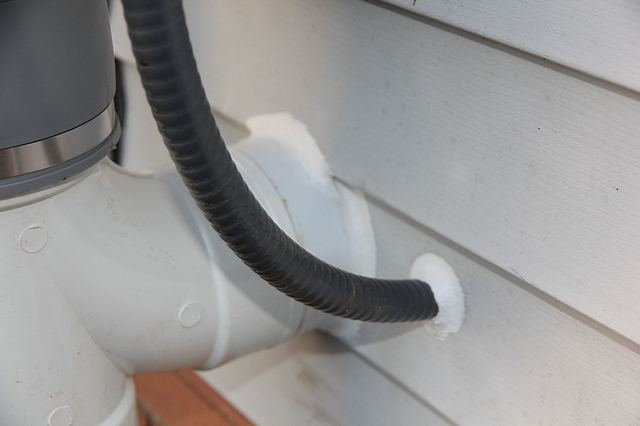
The outside piping gets cold in the winter and condenses a lot of moisture inside the pipe. Other companies just let the water drain back into the suction holes. We drain this moisture to the outside with a Tee fitting to prevent this water from re-entering the sub-slab area. |
 |
|
|
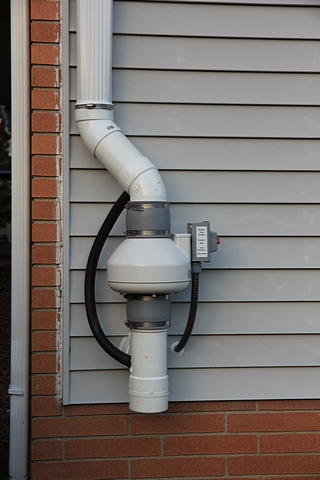
We want all of our systems to be very energy efficient and quiet. We use either a 70 watt fan or a super efficient 20 watt fan if the house has a sub-slab gravel base and cracks that can be sealed. Some companies use a 140 watt fan that can cost as much as $2000 to run over the life of the fan. |
 |
|
|
For us: How the system looks is as important as how well it functions. |
 |
|
|
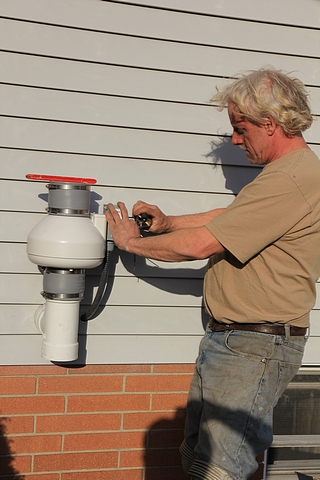
Improper wiring is dangerous. We pay special attention to the electrical connections. All the exterior wiring is in conduit. Let's move inside and check on Brian. |
 |
|
|
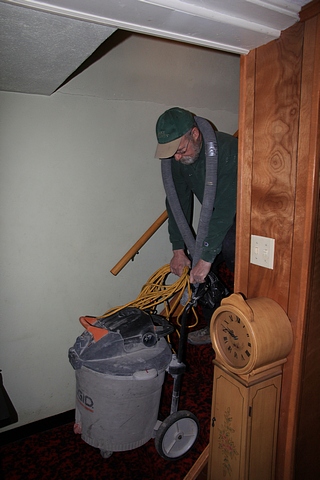
We don't want to add any dust or dirt to the house. We always use a shop vacuum with highest quality filter. This house had a finished basement. |
 |
|
|
Brian is drilling a small test hole to locate the footer that supports the foundation. We like to keep the radon pipe next to the foundation wall to minimize its appearance and obstruction. |
 |
|
|
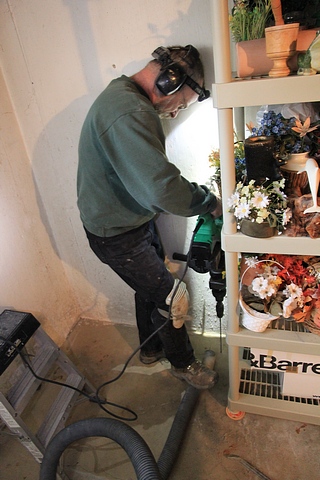
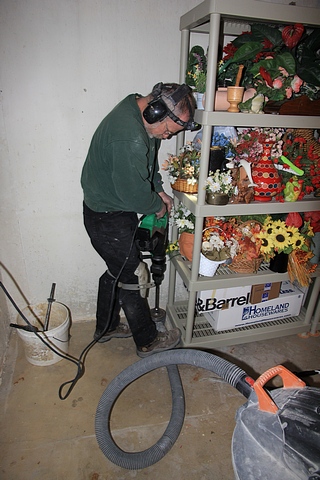
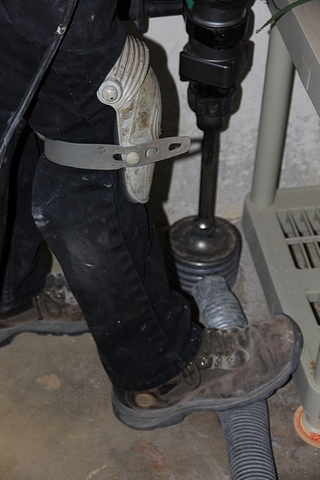
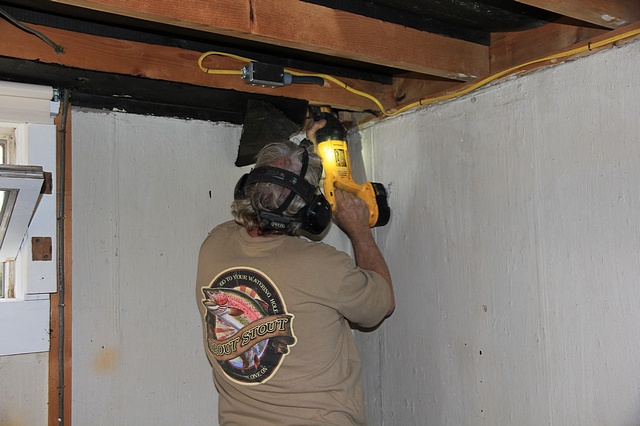
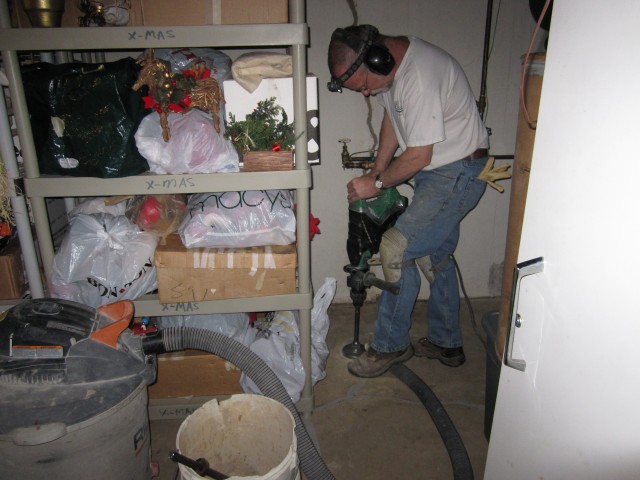
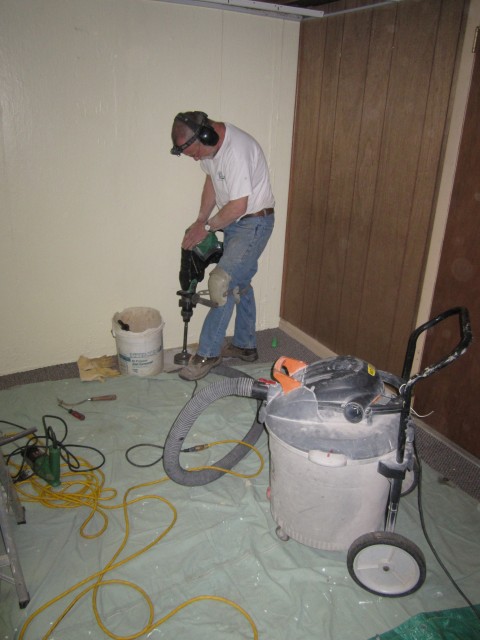
Brian is core drilling the slab in a tight location. The crew always wears protective equipment and head lamps to see their work. |
 |
|
|
Other companies use a jack hammer to fracture through the slab. We use a 5" core bit that cuts a smooth hole through the slab. |
 |
|
|
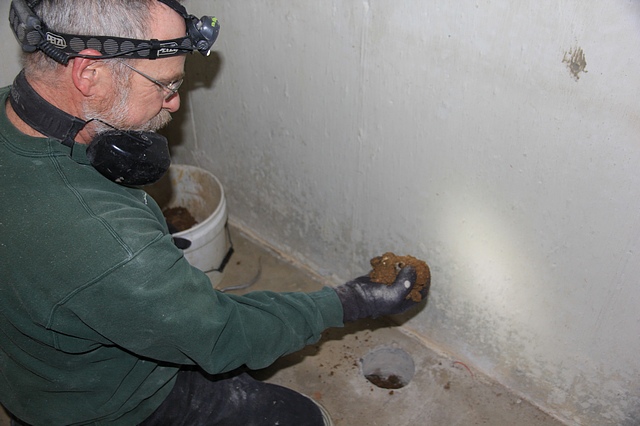
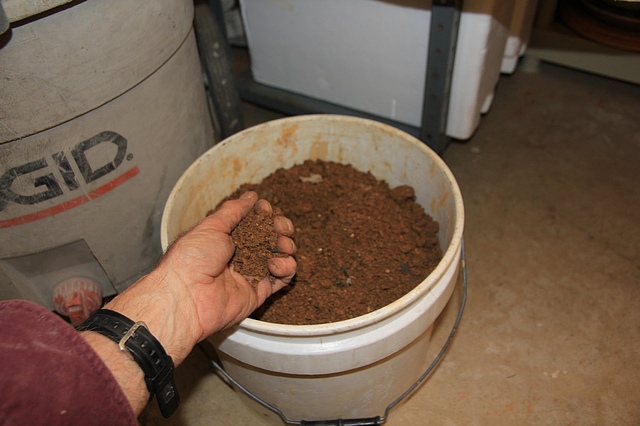
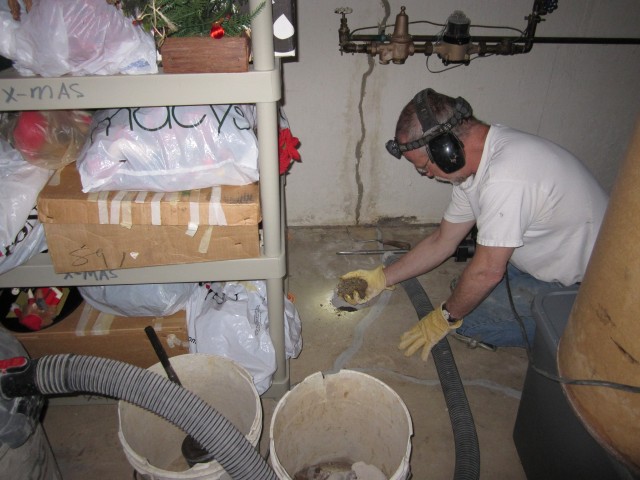
The owner told us there was a stone base under the slab. What we found was sandy dirt. |
 |
|
|
This is the soil below this slab. Let's head back outside and see how Mark is doing. |
 |
|
|
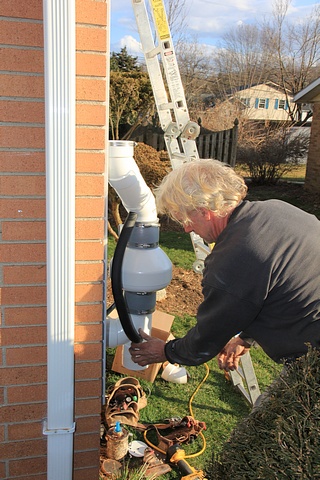
On the bottom of the Tee fitting, Mark has installed a cap, with drain holes in the bottom of the cap, to allow the condensation to drain out. The black tubing collects the water above the fan and diverts it to the drain cap. The tubing is insulated to make sure the system works on the coldest winter days. In the winter this draining water will form an icicle. The ice shows that the drain is working. |
 |
|
|
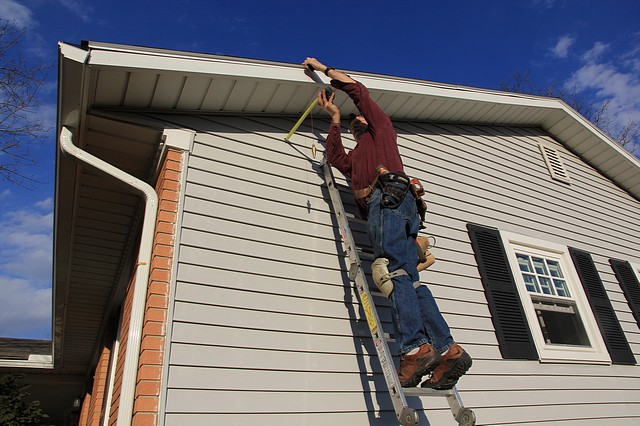
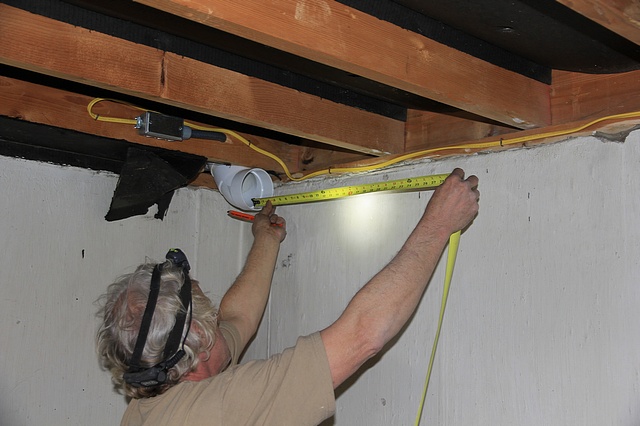
Bill is using a traditional plumb bob to accurately measure the overhang the piping needs to be routed around. |
 |
|
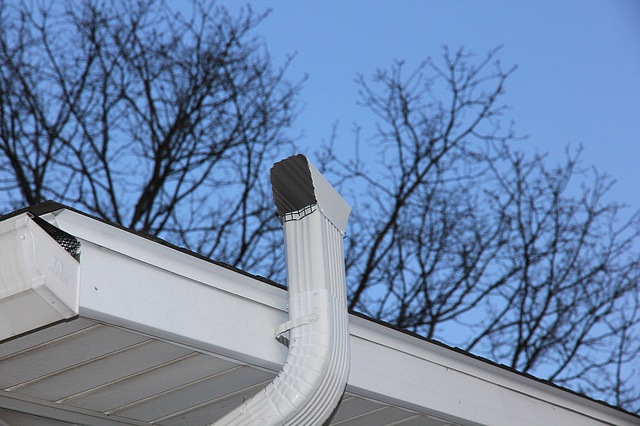
In the truck we duplicate the overhang distance to ensure a perfect fit. The owner requested that we match the exhaust to the existing downspout to minimize the system appearance. We use oversized 3"x 4" downspout to ensure that this piping does not restrict the system airflow. |
|
|
The aluminum downspout is carefully sealed as it is assembled to make it airtight |
 |
|
|
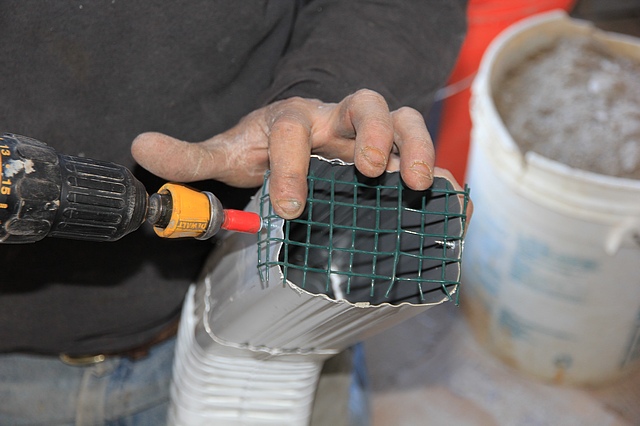
We learned that: Weather resistant screen needs to be installed at the exhaust to prevent squirrels or other critters from getting into the pipe. |
 |
|
|
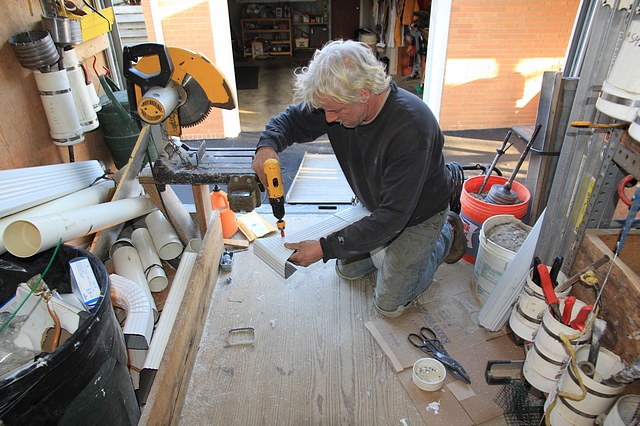
Our cube van becomes an important shop to do quality work. Mark is pre-installing a chimney cap. |
 |
|
|
Mark is installing the exhaust piping while making sure it is plumb. |
 |
|
|
The PA DEP requires the radon exhaust to be above the roof. |
 |
|
|
Sealing the penetrations back into the building is obviously important to prevent water intrusion. |
 |
|
|
|
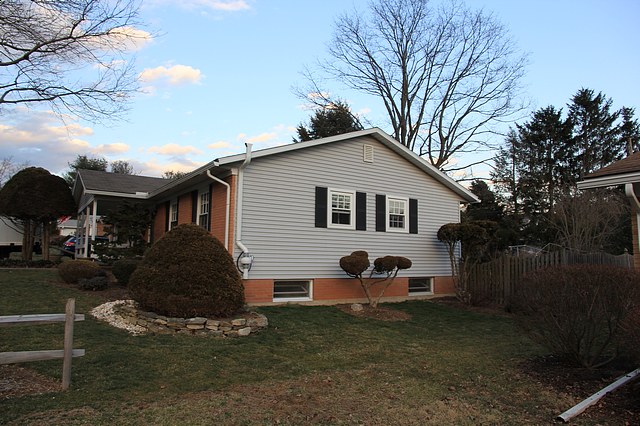
Here's the final system on the side of the house. |
 |
|
|
And this is how the system looks from the side. Now let's head back inside and see how Brian is doing. |
 |
|
|
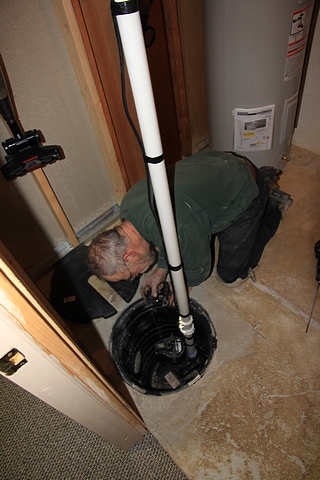
This house had a new sump pit that was open to the sub-slab soil. An air-tight lid needs to be installed. |
 |
|
|
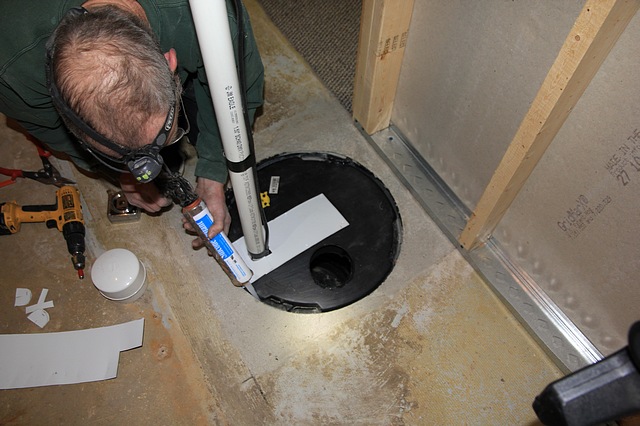
There was an existing plastic cover that Brian modified. the yellow circle is a one-way drain he installed to provide emergency drainage into the sump if the basement floods. The PA DEP requires a drain if a drain previously existed |
 |
|
|
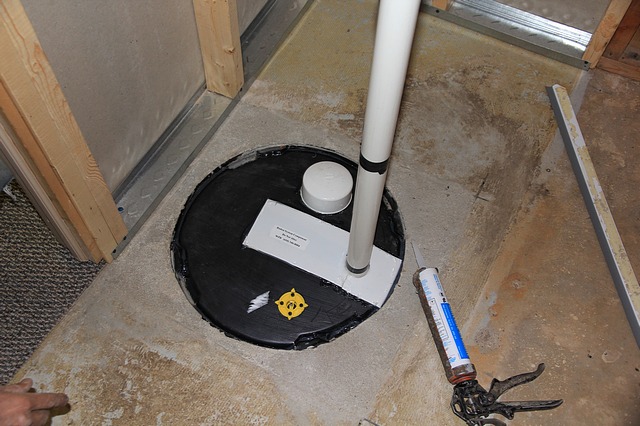
The sump cover is sealed with silicone caulking to allow easy removal if the pump needs to be replaced. The large hole is for a removable cap so that the owner can easily check that the sump pump is operational. |
 |
|
|
This is the completed sealing of the sump pit. It includes a label that says this sump has been sealed to reduce radon entry. Let's check out the final system wiring. |
 |
|
|
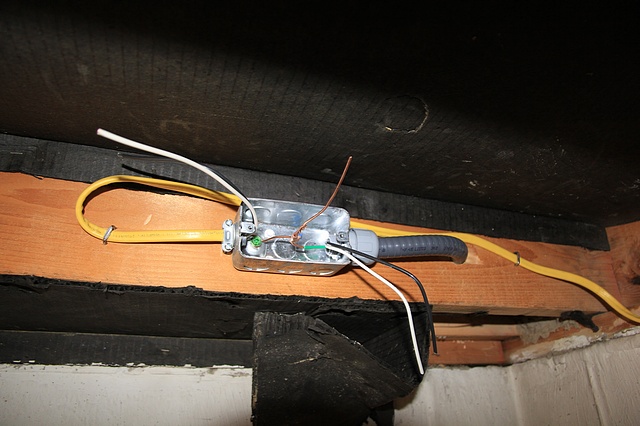
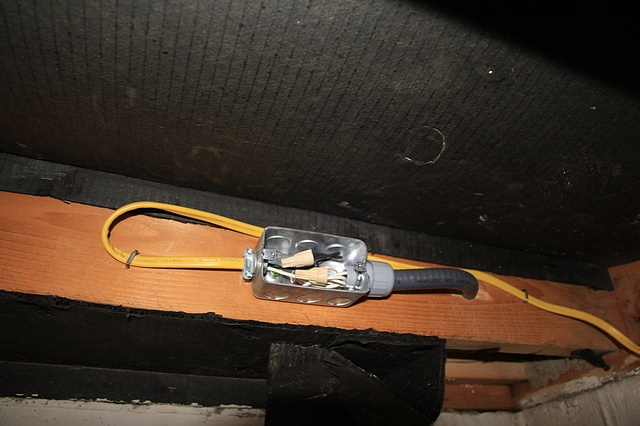
The conduit from the fan is routed to a new metal electrical box inside the basement. Single conductors are routed to the fan through the conduit. It is important that the ground wires be carefully connected and the box grounded. |
 |
|
|
The electrical source for the fan has been determined to be 20 amp, so all the fan wiring must be 12 gauge. Some companies will use under-sized wiring which is against code and is a fire hazard. |
 |
|
|
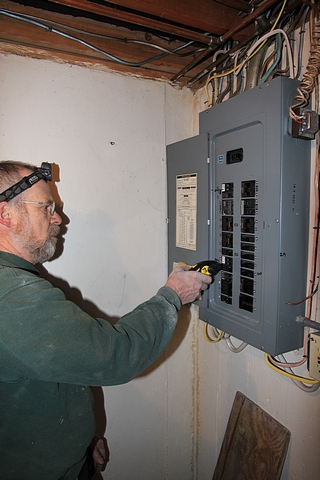
The system does not require a separate breaker, which means an existing circuit can be used. You must however determine which breaker the fan is wired to. The yellow tool is a circuit finder. |
 |
|
|
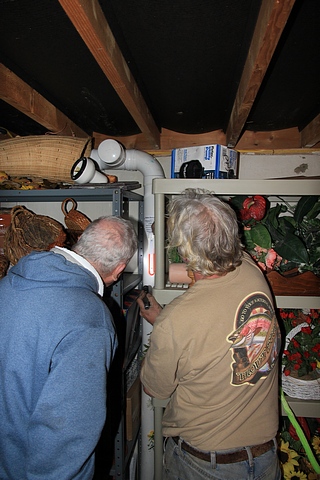
Brian is using the circuit finder to locate which circuit the fan is going to be wired to. This prevents us from tripping the breaker while we are installing the wiring. |
 |
|
|
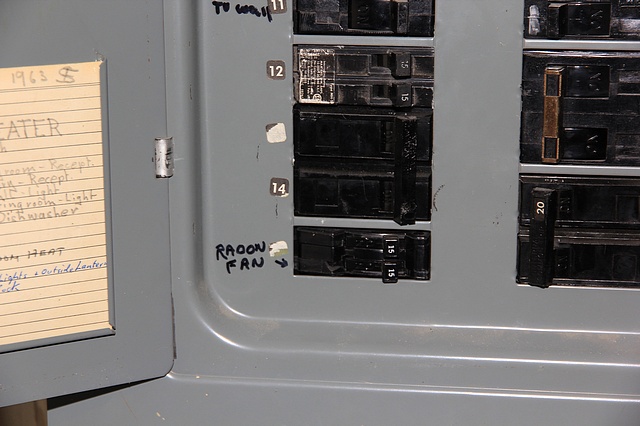
We clearly mark the breaker the fan is wired into, so the owner can easily check it. |
 |
|
|
The piping run is really tight. Their was no room for error routing the pipe into this basement. |
 |
|
|
Mark got the piping into the basement. He is running it over to the suction hole. |
 |
|
|
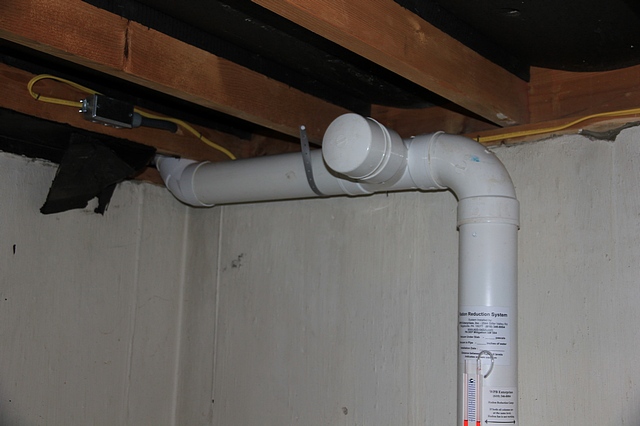
The original system design called for one suction pipe because we assumed there was a gravel sub-base. We added a capped Tee to facilitate adding additional suction holes. |
 |
|
|
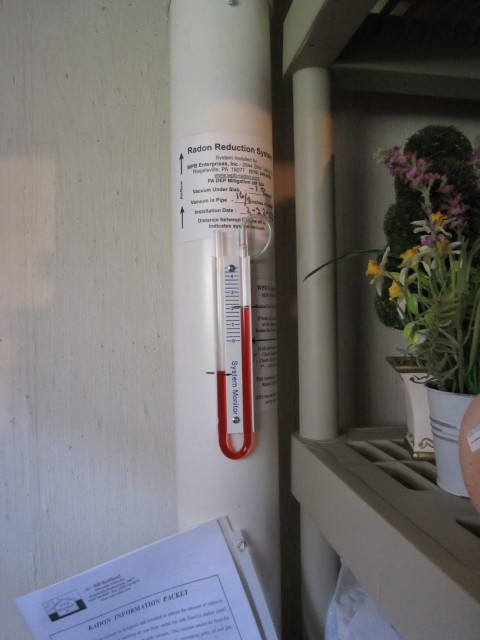
This is the U-Tube which indicates the suction the system is creating and that the fan is operating. When the oil columns are even, the fan is not operating and made need service. When the oil columns are different that means the fan is operating and drawing air from under the slab. |
 |
|
|
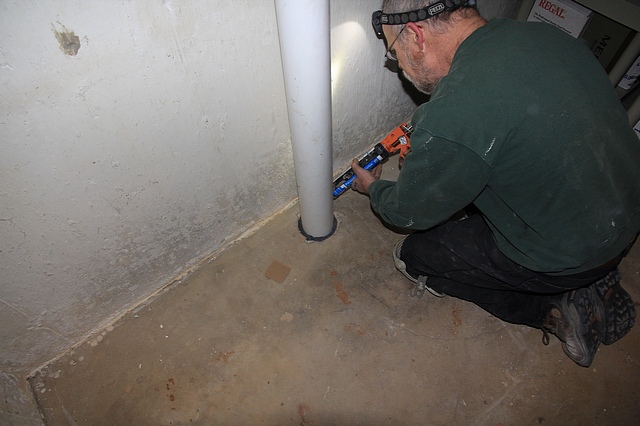
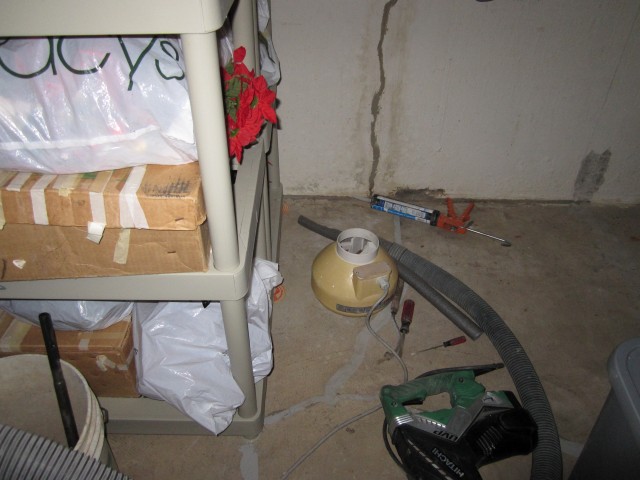
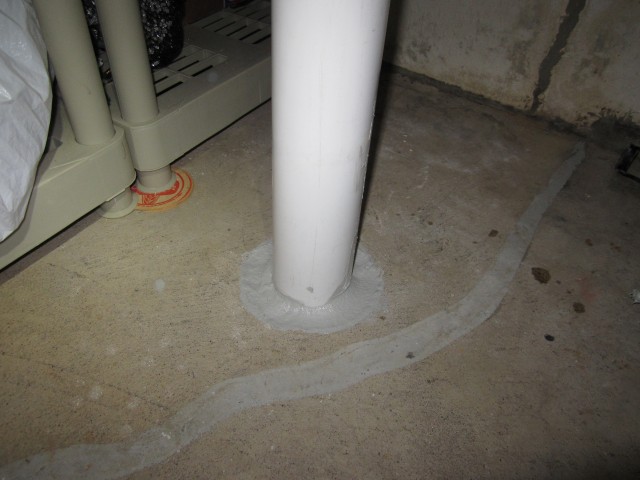
Brian is sealing the radon vent pipe as it enters the slab. The seal we use will stop water from coming up through the hole we installed in the slab |
 |
|
|
It is very important to seal any cracks in the slab to improve the system's effectiveness. When there is only dirt under the slab, it is even more important because of the low airflow moving through the sub-slab soil |
 |
|
|
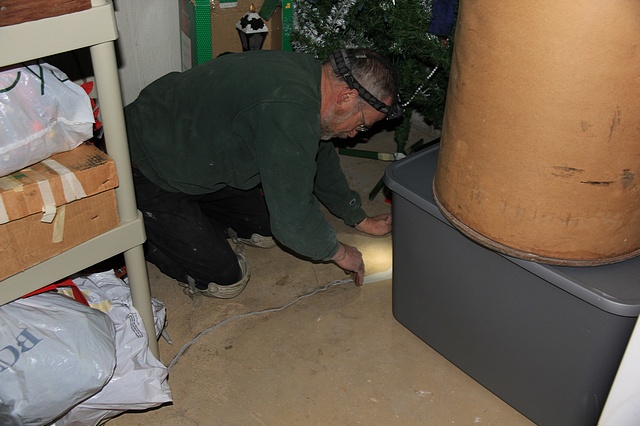
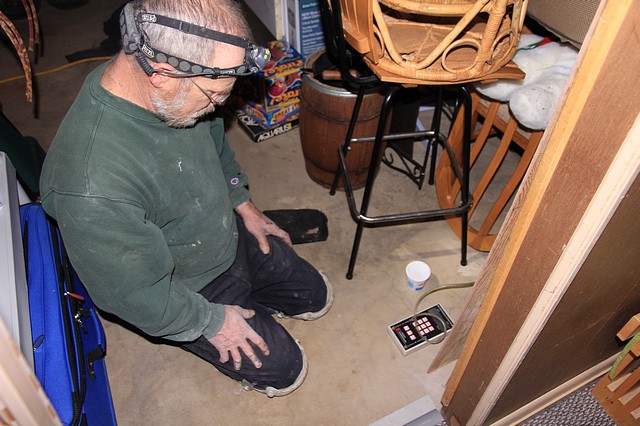
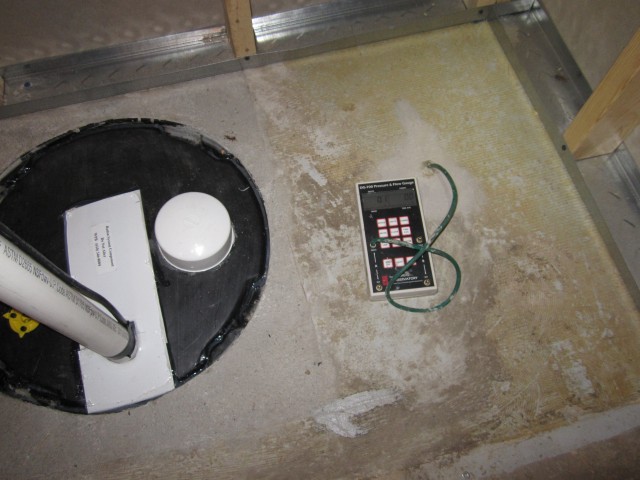
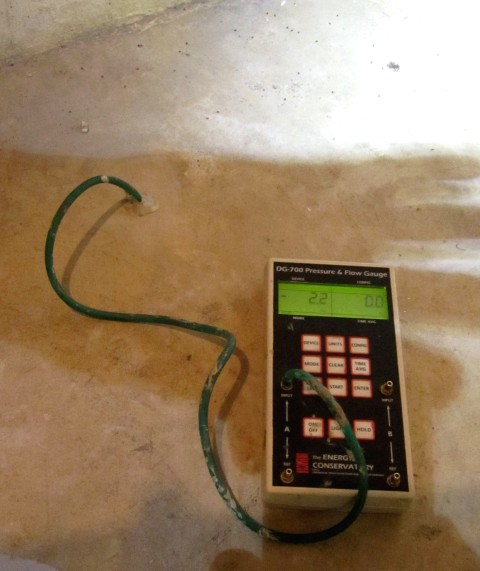
Once the system is running and the cracks are sealed we measure the suction the system is creating under the slab with a digital micro-monometer that can detect any sub-slab pressure change induced by the fan. The test hole farthest from the suction pipe did not show any pressure change. |
 |
|
|
The test hole half way across the slab did show negative pressure under the slab. |
 |
|
|
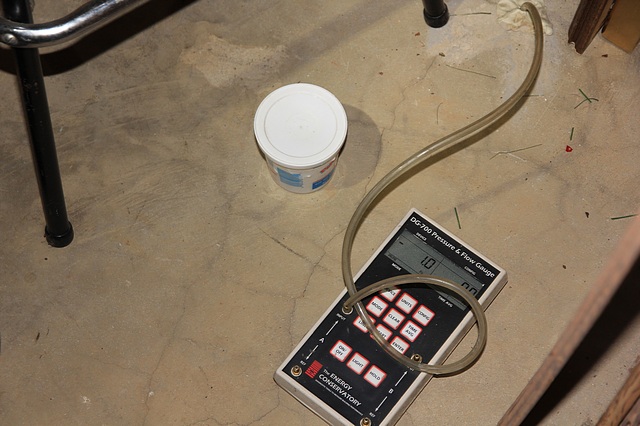
Our instrument is showing negative 1.0 pascals ( -0.004" of static pressure)in the middle of the basement. This is adequate sub-slab negative pressure but it is only half way across the basement. The farthest test hole showed no pressure change from the system. |
 |
|
|
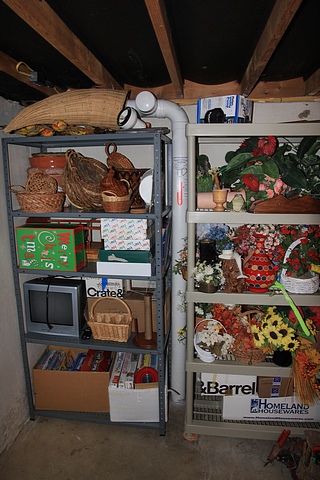
The customers shelves have been moved back in place. The final U-Tube reading is showing a large difference between the two oil columns. This indicates that the system is moving a low amount of air out of the suction hole which is expected considering the dirt under the slab. |
 |
|
|
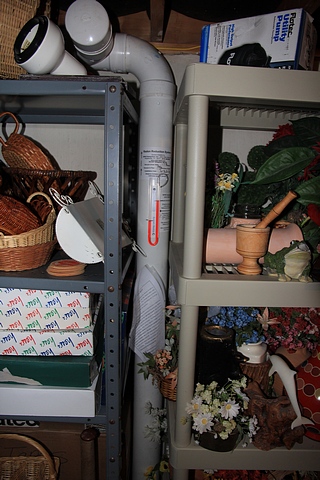
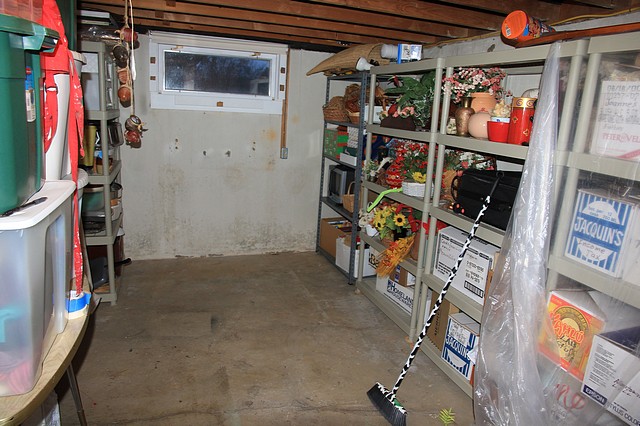
With good pre-planning we were able to fit the piping between the owners shelves. |
 |
|
|
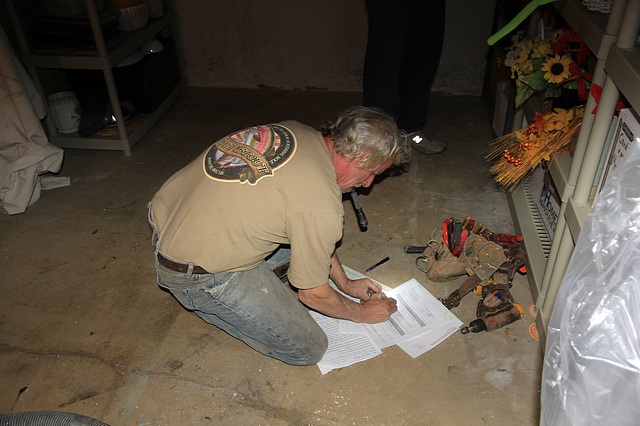
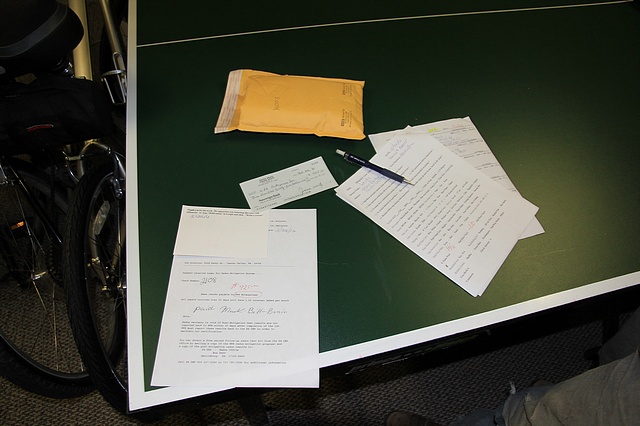
Mark fills out all the necessary paper work. We have to report the system to the PA DEP as part of our Mitigation Certification. |
 |
|
|
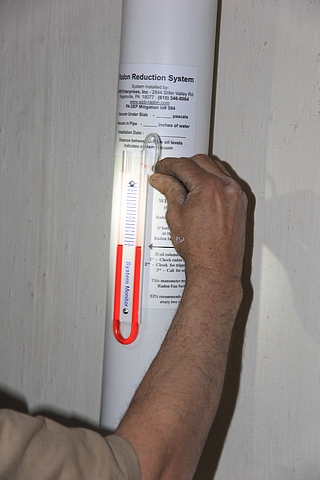
We leave an information package on the system piping so that any future homeowner has information about how the system operates and what to check to make sure it is running properly. |
 |
|
|
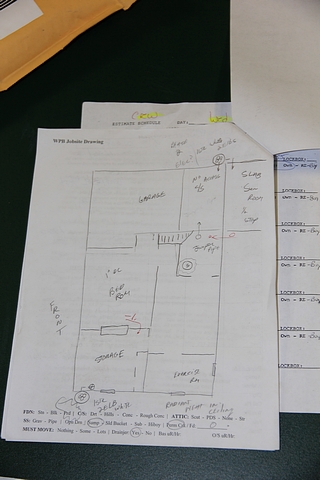
The documentation includes a system drawing showing where the system has been installed and the final vacuum readings that were obtained. The PA DEP requires this to be included with the system documentation. |
 |
|
|
Mark explains how the system works to the homeowner so he fully understands how to read the gauge and check on the fan operation. We discussed the sub-slab pressure readings with the homeowner and the possibility of needing to add an additional suction pipe to compensate for the lack of gravel under the slab. We recommended that an initial post mitigation radon test be done first |
 |
|
|
We always do a final cleanup to leave the basement as neat as when we arrived. |
 |
|
|
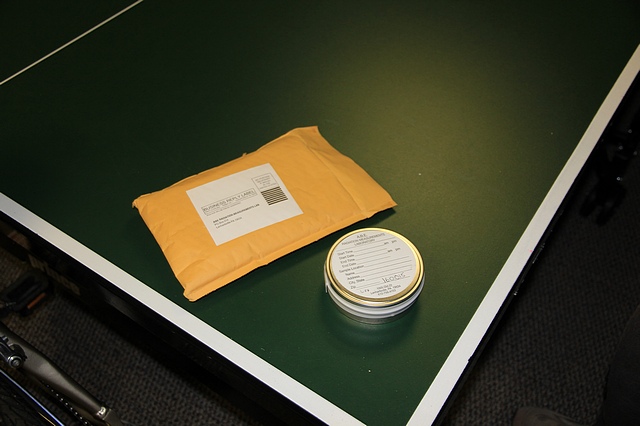
If the system was installed as part of a real estate transaction then an independent test company is hired to provide a post mitigation test. In this case the homeowner was going to perform the post mitigation test himself. We provided a test kit from an independent local lab. The test can be started 48 hours after the system is installed. |
 |
|
|
And of course we need to get paid. We typically take a check at the completion of the installation. |
 |
|
About Two Weeks later we got the Radon Test Results. The Radon levels had dropped in half but were still above the guideline level. This was due to only getting negative pressure under half of the basement slab We called the owner and scheduled a 2nd visit. |
|
|
When we arrived for our second visit, we discussed options with the Owner. We decided to 1st put a second suction pipe in the unfinished portion of the basement and test the sub-slab vacuum |
 |
|
|
Once again Brian only found packed dirt under the slab. |
 |
|
|
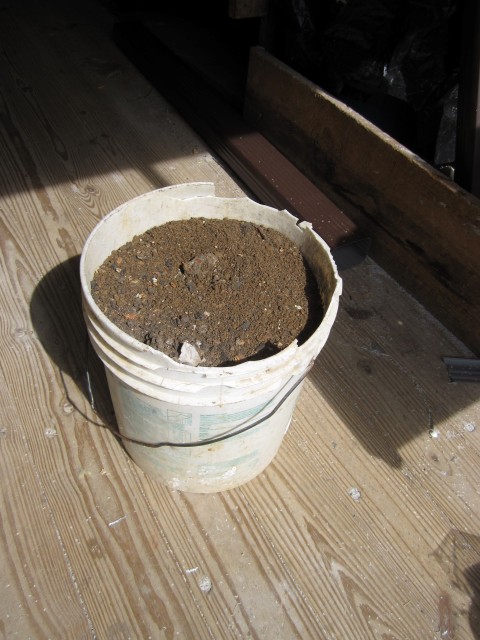
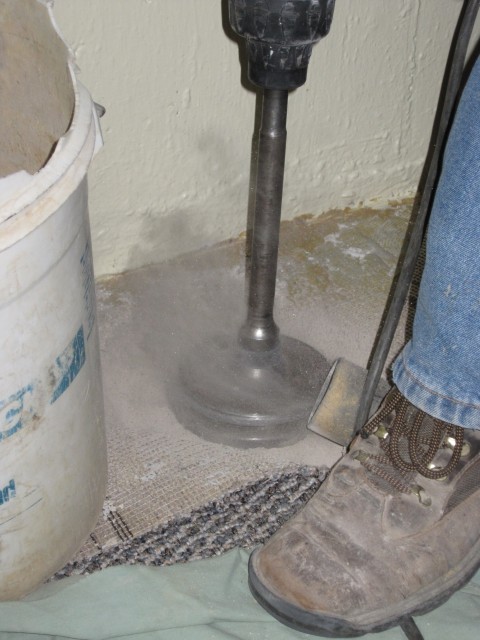
We excavated 5 gallons of dirt out of the suction hole to maximize it's effectiveness. |
 |
|
|
After the suction hole was dug out we turned on a test fan and placed it in the new suction hole. We then went to the far sub-slab test hole and measured any pressure change the new suction hole induced. |
 |
|
|
With the Test Fan operating, the far sub-slab test hole was still not showing any sub-slab pressure. At that point we knew we needed to install a third suction hole to get sub-slab negative pressure under the entire basement slab. |
 |
|
|
The third suction hole needed to be installed in the finished area of the basement. We consulted with the homeowner and together chose this location. Other Radon Companies would try fixing a non-passing installation with a bigger fan because it is easier for them. IN THIS CASE A BIGGER FAN WOULD NOT HAVE WORKED! |
 |
|
|
Core drilling causes a lot of dust. We only use the best filters on our shop vacuum to capture the dust. |
 |
|
|
We routed new piping into the suction hole in the unfinished side and sealed around the pipe |
 |
|
|
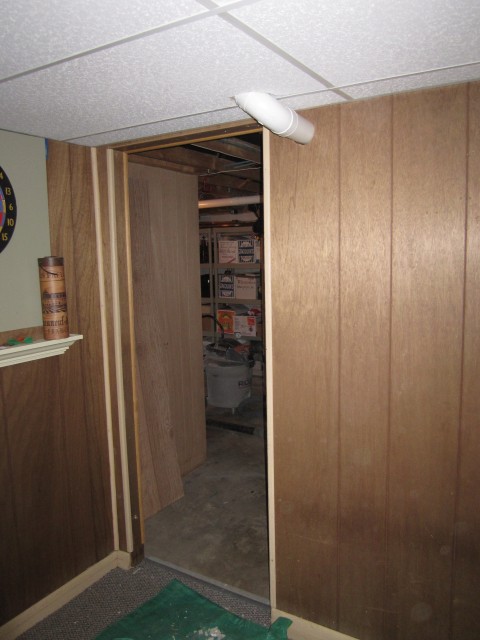
Mark & Brian did a great job minimizing the piping in the finished area by carefully routing the piping up above the drop ceiling. |
 |
|
|
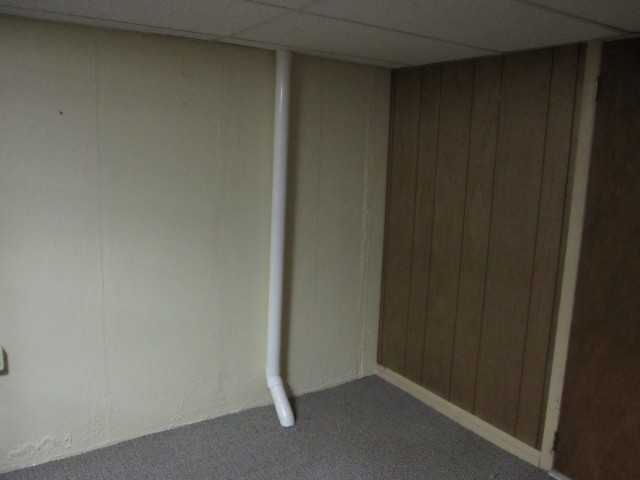
The pipe riser had to be exposed in the finished room but the appearance was minimized with most of the piping above the drop ceiling. |
 |
|
|
The u-tube reading did not change even though there were now three suction holes instead of the one suction hole that was installed during the initial installation. This indicates that the sub-slab is very tight. The more important factor is whether there is negative pressure under the entire basement slab. The final step is to test the sub-slab vacuum again. |
 |
|
|
The sub-slab test hole in the middle of the basement that was reading negative 1.0 pascals increased to negative 46 pascals. The far sub-slab test hole that was reading positive 0.7 pascals is now reading negative 2.2 pascals. The suction hole in the finished room worked! |
 |
|
|
We discuss with the Owner a good location for the second radon test kit and tell him he should wait a few days before he starts the test. |
|
|
|
Time to pack up the truck. We fixed this difficult installation without using a larger fan which we knew would not have helped. The extra suction holes will not cost the homeowner any additional operating cost. The original radon levels of 19.2 pCi/L have now been reduced to 2.4 pCi/L |
 |
|
I hope these photos give you an idea of how we pride ourselves on doing a first rate job. Check out our many Customer Comments We used an RP145 fan. See what using a Larger Fan would have cost the homeowner. Sincerely, Bill Brodhead |
|
|
Other job pictures Commercial Job Photos Military job photos |
|
|
We use a large cube van for all of our installations. This way we can have a complete inventory of everything we will need to ensure your system is installed as it should be. All we ask is that you make room for us in your driveway because Mark and Brian are anxious to do a great job for you. |
|
|
This will be a system with an outdoor fan. Mark is drilling a test hole through the siding to be sure it is lined up perfectly. |
|
|
With the alignment just right, Mark uses a heavy duty right angle drill with a hole saw to cut through the siding and rim joist. |
|
|
Mark is drilling a hole to install outdoor rated electrical conduit. Some radon companies use questionable extension cord type electrical connections |
|
|
The outside piping gets cold in the winter and condenses a lot of moisture inside the pipe. Other companies just let the water drain back into the suction holes. We drain this moisture to the outside with a Tee fitting to prevent this water from re-entering the sub-slab area. |
|
|
We want all of our systems to be very energy efficient and quiet. We use either a 70 watt fan or a super efficient 20 watt fan if the house has a sub-slab gravel base and cracks that can be sealed. Some companies use a 140 watt fan that can cost as much as $2000 to run over the life of the fan. |
|
|
For us: How the system looks is as important as how well it functions. |
|
|
Improper wiring is dangerous. We pay special attention to the electrical connections. All the exterior wiring is in conduit. Let's move inside and check on Brian. |
|
|
We don't want to add any dust or dirt to the house. We always use a shop vacuum with highest quality filter. This house had a finished basement. |
|
|
Brian is drilling a small test hole to locate the footer that supports the foundation. We like to keep the radon pipe next to the foundation wall to minimize its appearance and obstruction. |
|
|
Brian is core drilling the slab in a tight location. The crew always wears protective equipment and head lamps to see their work. |
|
|
Other companies use a jack hammer to fracture through the slab. We use a 5" core bit that cuts a smooth hole through the slab. |
|
|
The owner told us there was a stone base under the slab. What we found was sandy dirt. |
|
|
This is the soil below this slab. Let's head back outside and see how Mark is doing. |
|
|
On the bottom of the Tee fitting, Mark has installed a cap, with drain holes in the bottom of the cap, to allow the condensation to drain out. The black tubing collects the water above the fan and diverts it to the drain cap. The tubing is insulated to make sure the system works on the coldest winter days. In the winter this draining water will form an icicle. The ice shows that the drain is working. |
|
|
Bill is using a traditional plumb bob to accurately measure the overhang the piping needs to be routed around. |
|
In the truck we duplicate the overhang distance to ensure a perfect fit. The owner requested that we match the exhaust to the existing downspout to minimize the system appearance. We use oversized 3"x 4" downspout to ensure that this piping does not restrict the system airflow. |
|
|
The aluminum downspout is carefully sealed as it is assembled to make it airtight |
|
|
We learned that: Weather resistant screen needs to be installed at the exhaust to prevent squirrels or other critters from getting into the pipe. |
|
|
Our cube van becomes an important shop to do quality work. Mark is pre-installing a chimney cap. |
|
|
Mark is installing the exhaust piping while making sure it is plumb. |
|
|
The PA DEP requires the radon exhaust to be above the roof. |
|
|
Sealing the penetrations back into the building is obviously important to prevent water intrusion. |
|
|
|
Here's the final system on the side of the house. |
|
|
And this is how the system looks from the side. Now let's head back inside and see how Brian is doing. |
|
|
This house had a new sump pit that was open to the sub-slab soil. An air-tight lid needs to be installed. |
|
|
There was an existing plastic cover that Brian modified. the yellow circle is a one-way drain he installed to provide emergency drainage into the sump if the basement floods. The PA DEP requires a drain if a drain previously existed |
|
|
The sump cover is sealed with silicone caulking to allow easy removal if the pump needs to be replaced. The large hole is for a removable cap so that the owner can easily check that the sump pump is operational. |
|
|
This is the completed sealing of the sump pit. It includes a label that says this sump has been sealed to reduce radon entry. Let's check out the final system wiring. |
|
|
The conduit from the fan is routed to a new metal electrical box inside the basement. Single conductors are routed to the fan through the conduit. It is important that the ground wires be carefully connected and the box grounded. |
|
|
The electrical source for the fan has been determined to be 20 amp, so all the fan wiring must be 12 gauge. Some companies will use under-sized wiring which is against code and is a fire hazard. |
|
|
The system does not require a separate breaker, which means an existing circuit can be used. You must however determine which breaker the fan is wired to. The yellow tool is a circuit finder. |
|
|
Brian is using the circuit finder to locate which circuit the fan is going to be wired to. This prevents us from tripping the breaker while we are installing the wiring. |
|
|
We clearly mark the breaker the fan is wired into, so the owner can easily check it. |
|
|
The piping run is really tight. Their was no room for error routing the pipe into this basement. |
|
|
Mark got the piping into the basement. He is running it over to the suction hole. |
|
|
The original system design called for one suction pipe because we assumed there was a gravel sub-base. We added a capped Tee to facilitate adding additional suction holes. |
|
|
This is the U-Tube which indicates the suction the system is creating and that the fan is operating. When the oil columns are even, the fan is not operating and made need service. When the oil columns are different that means the fan is operating and drawing air from under the slab. |
|
|
Brian is sealing the radon vent pipe as it enters the slab. The seal we use will stop water from coming up through the hole we installed in the slab |
|
|
It is very important to seal any cracks in the slab to improve the system's effectiveness. When there is only dirt under the slab, it is even more important because of the low airflow moving through the sub-slab soil |
|
|
Once the system is running and the cracks are sealed we measure the suction the system is creating under the slab with a digital micro-monometer that can detect any sub-slab pressure change induced by the fan. The test hole farthest from the suction pipe did not show any pressure change. |
|
|
The test hole half way across the slab did show negative pressure under the slab. |
|
|
Our instrument is showing negative 1.0 pascals ( -0.004" of static pressure)in the middle of the basement. This is adequate sub-slab negative pressure but it is only half way across the basement. The farthest test hole showed no pressure change from the system. |
|
|
The customers shelves have been moved back in place. The final U-Tube reading is showing a large difference between the two oil columns. This indicates that the system is moving a low amount of air out of the suction hole which is expected considering the dirt under the slab. |
|
|
With good pre-planning we were able to fit the piping between the owners shelves. |
|
|
Mark fills out all the necessary paper work. We have to report the system to the PA DEP as part of our Mitigation Certification. |
|
|
We leave an information package on the system piping so that any future homeowner has information about how the system operates and what to check to make sure it is running properly. |
|
|
The documentation includes a system drawing showing where the system has been installed and the final vacuum readings that were obtained. The PA DEP requires this to be included with the system documentation. |
|
|
Mark explains how the system works to the homeowner so he fully understands how to read the gauge and check on the fan operation. We discussed the sub-slab pressure readings with the homeowner and the possibility of needing to add an additional suction pipe to compensate for the lack of gravel under the slab. We recommended that an initial post mitigation radon test be done first |
|
|
We always do a final cleanup to leave the basement as neat as when we arrived. |
|
|
If the system was installed as part of a real estate transaction then an independent test company is hired to provide a post mitigation test. In this case the homeowner was going to perform the post mitigation test himself. We provided a test kit from an independent local lab. The test can be started 48 hours after the system is installed. |
|
|
And of course we need to get paid. We typically take a check at the completion of the installation. |
|
About Two Weeks later we got the Radon Test Results. The Radon levels had dropped in half but were still above the guideline level. This was due to only getting negative pressure under half of the basement slab We called the owner and scheduled a 2nd visit. |
|
|
When we arrived for our second visit, we discussed options with the Owner. We decided to 1st put a second suction pipe in the unfinished portion of the basement and test the sub-slab vacuum |
|
|
Once again Brian only found packed dirt under the slab. |
|
|
We excavated 5 gallons of dirt out of the suction hole to maximize it's effectiveness. |
|
|
After the suction hole was dug out we turned on a test fan and placed it in the new suction hole. We then went to the far sub-slab test hole and measured any pressure change the new suction hole induced. |
|
|
With the Test Fan operating, the far sub-slab test hole was still not showing any sub-slab pressure. At that point we knew we needed to install a third suction hole to get sub-slab negative pressure under the entire basement slab. |
|
|
The third suction hole needed to be installed in the finished area of the basement. We consulted with the homeowner and together chose this location. Other Radon Companies would try fixing a non-passing installation with a bigger fan because it is easier for them. IN THIS CASE A BIGGER FAN WOULD NOT HAVE WORKED! |
|
|
Core drilling causes a lot of dust. We only use the best filters on our shop vacuum to capture the dust. |
|
|
We routed new piping into the suction hole in the unfinished side and sealed around the pipe |
|
|
Mark & Brian did a great job minimizing the piping in the finished area by carefully routing the piping up above the drop ceiling. |
|
|
The pipe riser had to be exposed in the finished room but the appearance was minimized with most of the piping above the drop ceiling. |
|
|
The u-tube reading did not change even though there were now three suction holes instead of the one suction hole that was installed during the initial installation. This indicates that the sub-slab is very tight. The more important factor is whether there is negative pressure under the entire basement slab. The final step is to test the sub-slab vacuum again. |
|
|
The sub-slab test hole in the middle of the basement that was reading negative 1.0 pascals increased to negative 46 pascals. The far sub-slab test hole that was reading positive 0.7 pascals is now reading negative 2.2 pascals. The suction hole in the finished room worked! |
|
|
We discuss with the Owner a good location for the second radon test kit and tell him he should wait a few days before he starts the test. |
|
|
Time to pack up the truck. We fixed this difficult installation without using a larger fan which we knew would not have helped. The extra suction holes will not cost the homeowner any additional operating cost. The original radon levels of 19.2 pCi/L have now been reduced to 2.4 pCi/L |
|
I hope these photos give you an idea of how we pride ourselves on doing a first rate job. Check out our many Customer Comments We used an RP145 fan. See what using a Larger Fan would have cost the homeowner. Sincerely, Bill Brodhead |
|
|
Other job pictures |
|
|
|
|
|
Radon mitigation call Integra Environmental 610 346-8004 |